How To Paint An Accent Wall Like A Pro
Published by
Imagine Homes
Want to add a little zing to a room in your new home without having a major remodel situation (or breaking the bank)? Consider painting an accent wall! It may sound intimidating, but we promise it can be easy. Keep reading to learn how to do it the right way. Then, get cracking!
First things first, you have to pick the wall you want to paint and what color to paint it. Seems basic right? Well, before you break out the paint roller, there are several things to consider. Which wall should be the focal point of the room? How does daylight affect the look and size of the room throughout the day? All these factors go into selecting the appropriate wall and shade. Check out this super informative article to help you decide!
Now that you’ve decided on colors, it’s time to purchase supplies. You’ll need to head to your local hardware store and purchase your paint, a smooth paintbrush for hand painting, a roller with an extension handle, a paint pan, painter’s tape, and drop cloths/tarps.
It’s time to get down to business. Follow these step-by-step instructions for perfection.
- This may seem obvious, but be sure to remove any photos/art/décor to a safe place from the wall you’re painting. Also move any furniture that may be in the way.
- With drop cloths or tarps, cover the floor and any unmovable furniture to avoid paint drips.
- Outline each edge of the wall with painter’s tape to ensure you won’t accidently paint the floor or adjacent walls. Don’t skip this step. Trust us!
- Inspect the wall for any rough spots or holes. Patch and smooth over with a sander where necessary.
- Using the smooth, handheld paintbrush “cut” or paint along the perimeter of the wall using a side-to-side motion. This allows you to get right up to the outline of the wall to ensure accuracy.
- Fill your paint pan with paint. Be sure not to over-fill. You’ll need to be able to run your roller across the top ridges of the pan to get rid of excess paint. Excess paint = dripping, and no one wants that.
- Dip the roller so it is saturated but not dripping in paint! Also, if you have a friend helping you, this is a good time to initiate a paint war. Just a tip!
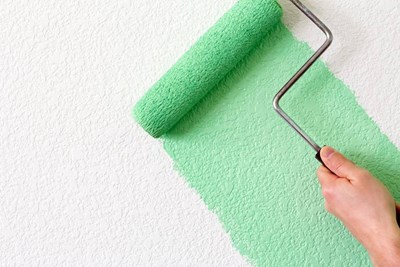
- Now paint! You’ll want to make a “W” motion to ensure there’s no streaking. Streaking is the enemy here, especially when working with darker paint.
- Let the paint dry, remove painter’s tape, and voila!
If you’re still nervous about tackling this paint job, check out this article. It’ll give you more details.
How did it go? Let us know-we’d love to hear from you!